/* */ Beulah Bee: Flower Garden stamp set
Showing posts with label Flower Garden stamp set. Show all posts

October 15, 2019

This Happy Life


Thanks to Columbus, I had the day off yesterday and an opportunity to make something for Simon's Monday challenge (this week's theme is "Pink").

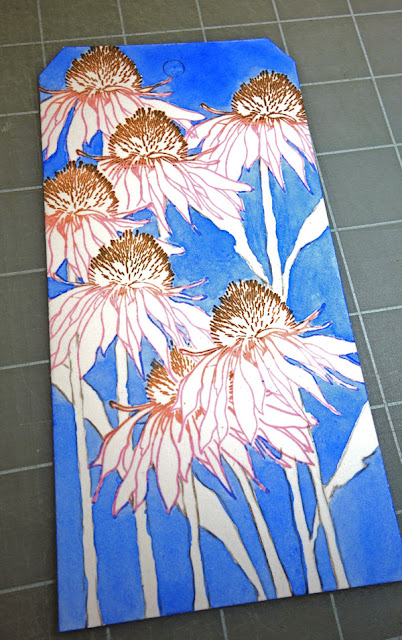
Nothing says pink like a coneflower so I made this tag by stamping on watercolor paper (Tim Holtz Flower Garden), the text is an old Remnant Rub, and the border was machine-stitched and dotted with Nuvo Crystal Drops.

Just a few things, technique-wise, that you might appreciate:


I'm sure you've seen the "no-line" technique when it comes to stamping an image that you plan to watercolor using a light shade of dye (water-based) ink so the lines disappear. But I like the lines! So for this tag, I stamped with archival inks using a pink, a tea stain, and a dark brown shade. The lines darkened somewhat after the watercoloring was applied.


Obviously, I had to do some masking to stamp this arrangement. But I didn't use the stems that come with the set and drew them on instead.

The photo above shows how I painted the background first using a juicy puddle of cobalt blue.


The bee was an after-thought. It was stamped onto a piece of tissue paper, cut-out, pasted on and then I dabbed a tiny bit of yellow paint on to its body.

It's also worth mentioning that I prefer to use a "hot-press" version of watercolor paper when I plan to stamp on it. Cold-press has bumps that I think make it harder to get a crisp image.

If you haven't tried watercoloring with rubber stamps, I can tell you it really is a lot of fun and very rewarding. Go for it!

April 26, 2018

Polyommatus Theo


This moth was clipped from some vintage Tim Holtz kraft paper and it was labeled as a "Polyommatus Theo." Now you know.


It became a decoration for this greeting card made from other Tim papers as well as an old book page. I seldom add sentiments so I can use the card for any occasion.


The flowers (Stampers Anonymous Flower Garden set) had another life before they became a part of this card. When a tag I was working on turned south, I cut them off the tag and reused them.


I used a transparent white paint to fill-in the flowers and the Distress inks underneath bled through. This explains the coloring you see in the final piece.

The text stamp is Stamper's Anonymous Ledger Script and the dots are Perfect Pearls and there's also a bit of machine stitching (something you don't see on a store-bought card).

I'm linking to Simon's Monday Challenge blog for this week's theme which is Flower Power.

April 23, 2018

Marigold


I've made a greeting card to thank the hostess for a party my husband and I were invited to over the weekend.

It's nothing out of the ordinary but I used a few less common techniques that I thought would be fun to share.

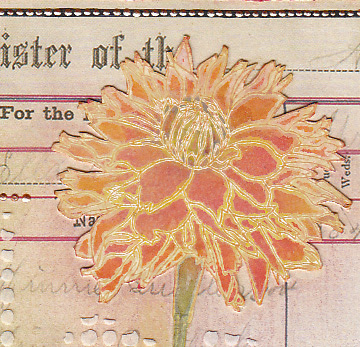
The main ingredients are the Flower Garden stamp set, a page from the Etcetera paper stash, some Tissue Tape, and a Dot Fade stencil (Tim Holtz).


I stamped then embossed the flower, tinted it with Distress inks then used super-cheap kid's construction paper as blotting paper and a hot craft iron to remove the embossing. Newsprint also works great for this technique. To learn more about this process, see this post.


I know there are a set of die-cuts available for this stamp set but mine was cut-out by hand using an Exacto knife and self-healing cutting mat.


Here's a tip you might find useful: Cut as close to the image as you can but don't worry about the irregular edges. Then go back and make the tiny cuts later and you'll find it a lot less intimidating.


And finally I'll share a tip I've blogged about in the past (see this post) that helps you decide where to crop your scrapbook paper when designing a layout.

This template is nothing more than a sheet of transparency that I made lines on with a permanent marker. I put masking tape around the edges to mask the background. I lay this template over my paper and move it around until I find a spot that I like and mark the corners with a pencil dot to guide my cutting lines.

This week's theme at Simon's Monday Challenge Blog is "Flower Power" so I'm linking up. I haven't made a card in ever so long and it was such a pleasure that I plan to make some more for this week's challenge (I have lots of flower stamps 😉).

April 04, 2017

Happy Place


Has spring arrived where you live?

It's full-on here in the southwest desert and pity the poor allergy sufferers as our winter rains have brought a profusion of flowers.

The tiny, yellow, desert-kind that flock every tree and bush like snow and eventually fall to the ground covering it in drifts.

The bees are having a heyday and so am I now that I've returned to my happy place and I've made a collage.

I took step-out photos of the project hoping to share my technique but they just didn't turn out (my camera skills are rusty). So if you are interested in how it was made please read on and I'll describe it for you instead.

I covered a piece of heavy-weight drawing paper with random bits (including an alphabet die-cut scrap), then white-washed everything with a light coat of gesso and pasted it onto an old textbook cover.

I enlarged then laser-printed an image which was transferred to the background using gel medium. I sanded the surface here and there to age it's appearance.


I stamped flowers (Tim Holtz Flower Garden) using archival ink then tinted them with acrylic paint.

For the sentiment, I used Tim's new metallic stickers (Quotations) which I distressed a bit with sanding and Distress ink. I used his new design tape (French) just behind it.


The striped lines you see in the tape are the result of scanning my artwork (since I am currently camera-impaired). This is a digital anomaly only--they do not exist on the original tape.

November 24, 2016

Platinum Blondes


Kismet: When you're browsing through web feeds and come across a photo that inspires you to create and it just so happens the theme at Simon's Monday blog challenge is using three of anything!

I haven't watercolored in awhile and thought I'd give an ink and tempera resist technique another try, this time using a tag, hoping the smaller format might be more manageable. It was.

May 04, 2016

May Remix


Let me introduce a tag made with all "Tim" products as inspired by this month's 12 Tags of 2016 (minus the tattered florals) where his remix features a Tissue Tape resist technique.

In the end, mine is more about enhancing the flower blossoms that are so much fun to paint. To quote Tim, "...stay true to your style throughout the creative process."  So I did and the sentiment was chosen to reinforce his statement.


The stamp is from the Flower Garden set, the bee is from Tiny Things. The Bubble stencil, Lace Trimmings (sewn on with gold metallic ribbon) and Small Talk stickers helped to embellish and I used the same tissue tape as Tim which is called Symphony.


And I used watercolor paper cut into the shape of a tag instead of one made with traditional manila cardstock.

Tim's tape is, without a doubt, my favorite kind because it's translucent, tough, and stays stuck! Just a little piece of it here and there in a composition can add just the right effect.

This month's tag made me appreciate it that much more.

April 04, 2016

Today


I've been invited to be a Guest Designer for April at the Simon Says Stamp Monday Challenge Blog and if this is your first visit here--hello and welcome!


Our challenge this week is to use a resist technique and I chose embossing powder which works great with watercolor but I also wanted to alter the fine lines of my stamping. So here's the twist...

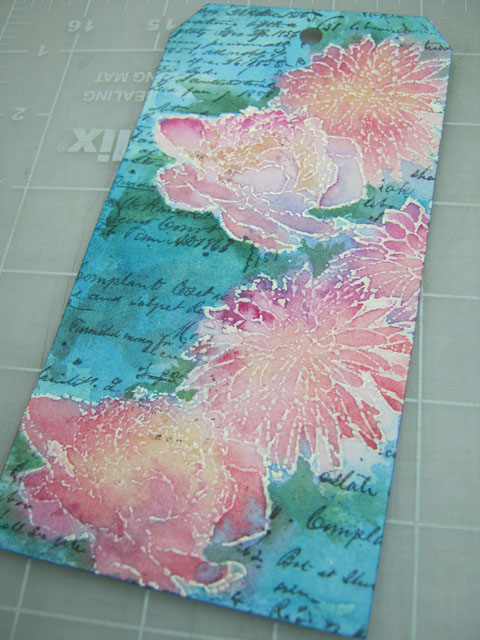
I cut a tag shape from Arches watercolor paper then stamped my flower shapes (Tim's Flower Garden Stamp Set) with ColorBox white pigment ink and sprinkled on Ranger's Ultra-Thick Embossing Powder.

Since this powder has chunky bits, I embraced this feature and encouraged some to fall off with extra tapping before it was heat-set to create a distressed appearance.


For a quick way to make a mask, I used wax paper and a graphite pencil to make a rubbing of the embossed surface.


I trimmed the mask along the edge outline and it was used to cover the flowers so I could stamp some background text (Tim's Ledger Script) with Ranger archival ink.


I applied water over the entire tag surface and let it soak in a bit before adding paint. This way, the colors run together creating natural blends and it prevents hard edges. The embossed lines make it easy to control and contain the paint.


It's optional, but I prefer to iron-off the embossing as a final step to even-out the surface and get rid of the shine. I use an old iron (dedicated to crafting) to re-melt the embossing while it is covered with newsprint (it has the best absorption). Pull the paper off immediately after applying heat because once it's cool the paper might stick.


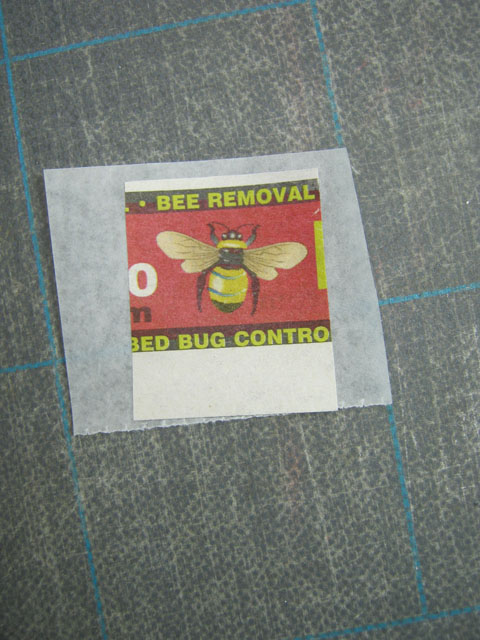
My stash of bee stamps is limited (what?) so I clipped an image from a newspaper advertisement and since the paper is flimsy I pasted it to some strong tissue, encased it with acrylic medium then cut it out.


I made some adjustments to the paint colors (added some stems and a bit more green), stitched tinted Lace Trimming along the side, added dots of dimensional paint and a Small Talk sticker.

The tag edges were darkened and I splattered watered-down white paint over the surface with finger flicks.

I'm happy with the mottled appearance and would recommend this resist technique if you want to give your stamped images a new vibe--distressed or otherwise.

----------------------------------------------------------------------------------

I really hope you'll join us for this week's challenge.

There are many resist techniques and I want to see what inspires you!

And when you upload your creation to the Simon Says Stamp Monday Challenge Blog you'll have a chance to win a $50 voucher at the Simon Says Stamp store!
https://www.simonsaysstamp.com/

Here's a list of the products I used for this challenge which can be ordered from Simon:


October 27, 2015

Life Mind


This month I worked through a blog challenge presented by A Vintage Journey where participants were asked to incorporate Tim Holtz techniques, style and/or products into their art journals.

Using the large format Dylusions journal, my first page was completed a few weeks ago and features a stamp from Tim's Flower Garden stamp set. It coincides with an online course I just completed on the subject of Mindfulness.

For the second page, I used only Tim Holtz stamps and if you don't count the Remnant Rubs text and some paint, I stayed true to my goal. I'll admit that the subject matter might have been a bit more interesting if my stash were larger but it was great fun just working with what I had.

And so, I'm also linking this post to Simon's Monday blog challenge--this week's theme is Throwback where you make something from a previous challenge. I picked the first challenge from July, 2013 called A Little Stamping which is what gave me the idea to use only stamping on my journal page.

To see more detail as you browse my images you can click on them to open the larger, lightbox view.


Journal Page No. 1


Journal Page No. 2


October 14, 2015

Mums


My entry for Simon's Monday blog challenge this week features a Tim Holtz Flower Garden stamp and watercolors.


I began by stamping the mums on watercolor paper with clear ink then used clear powder to emboss them.

Next I dropped in juicy yellow and orange watercolor, let it dry and then used a damp tissue to wipe it off the embossed lines.

I drew the likes of a basket and handle with my very handy Perfect Pearls pen, embossed with clear powder and filled them in with a brownish mix of watercolor.

Click to Enlarge

I used polka-dot washi tape to fill-in the basket around the flowers by pressing the tape down then cutting around the edges. A sharp blade and gentle pressure does the trick and prevents cutting into the background.

Then I masked the basket, flowers and handles so I could stamp the upper part of the tag with text (Heidi Swapp) using archival ink and tinted it with blue-green and magenta watercolor.

Final embellishments included hand-written text using a Gelly Roll pen, tacking on a bow and distressing the edges of the tag with walnut ink.


This becomes Tag Number 136 which I'll add to my collection at manilaguerilla.blogspot.com. But who's counting?