/* */ Beulah Bee: assemblage
Showing posts with label assemblage. Show all posts

August 16, 2019

Summer


I'm celebrating summer with this project, prompted by two blog challenges: Simon's Midsummer Blues and Frilly Funkie Junkie's Let's Do It Again. The blue part is self-explanatory and doing it again meant revisiting an old project and creating a remake.

You may know that I do love fussy-cutting and especially the flowers from the Tim Holtz Wallflower paper stash. So that, along with a Baseboard Doll and Lace Baseboard Frame, was what I used to assemble this project.

It was mounted inside the back of a wooden panel that I covered with paper. The doll's left arm was originally bent up high and was altered by slicing and dicing and piecing together some baseboard from another doll.


Here's the original project that inspired the "do-over." It is a Configurations Box I made for CHA 2015. Paper dolls hadn't been invented yet so I cut the girls from a Found Relative photo. It was the year the Wallflower paper stash came out and I assembled a garden for them to sit in.


So, it is still mid-summer here in the desert and we'll have at least two and a half more months of high temps. There hasn't been any monsoons that bring rain so the dry spell weather-wise coincides with my own personal artistic dry spell and lack of posts. I'm thankful for the prompts this week and it feels so good to be working again!

Update: So proud this post became a Top Pick on the TFJB blog--thank you!

February 05, 2019

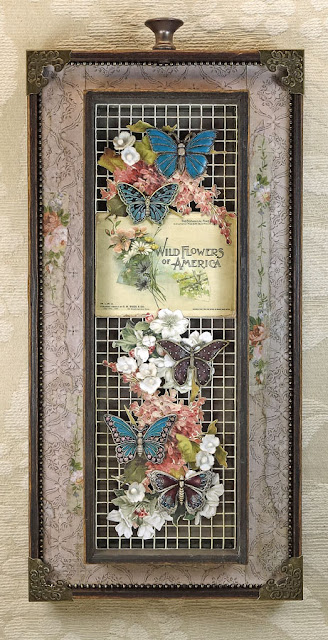
Wildflowers of America


I'm happy to be part of Richele Christensen's blog hop of artists who made show samples for the Tim Holtz booths at Creativation 2019.

This piece features Idea-ology and I used a Vignette Tray (large), new Vignette Divided Drawer, Worn Wallpaper, Butterfly Adornments, new Ephemera (Keepsakes), new/revised Layers (Botanicals), Bouquet, Mini Hardware, Corners, and Ball Chain.


I took the dividers out of the drawer, lined it with paper, anchored it inside a large tray, and placed 1/2" thick foam core around the circumference to make it less deep (underneath the Worn Wallpaper).

My technique for painting the butterflies is simple and all you need is a steady hand. I used thin acrylic paint and a tiny paint brush to apply multiple coats layering one transparent color over another.

The new/revised assortment of Botanicals (Layers) is really beautiful and was my inspiration for this piece. The mix of flowers is very different from the last release and much improved with lots of roses and lovely banner pieces all in multiple sizes of left and right versions.

Botanicals Layers - New Version
Botanicals Layers - Old Version

I also mixed in a few of the fabric-like flowers called Bouquet after lightly tinting the edges with Antique Linen Distress Ink.


The wire mesh in the background is made out of something called "hardware cloth." In my neighborhood, it's used as a fence around plants to keep the rabbits from chewing them.

I sponged on off-white paint and built a ledge for it to rest on from thin wooden strips painted to match the box's paper lining.

The Worn Wallpaper was distressed by placing torn strips over the top of one another and inking the edges to make them stand out. And yes, that's Ball Chain (it comes in three different metal finishes) which was used to embellish the border.


Good luck with the giveaway (comment by midnight PST February 9). The contest has ended, see winners announcement here.

I hope we've inspired you! If you are hopping in order, Cheiron Brandon is up next.

CREATIVATIONS 2019 BLOG HOP

Beulah Bee  YOU ARE HERE...

January 24, 2019

Creativation Idea-ology 2019


For details on this project (Wildflowers)--here's the link.


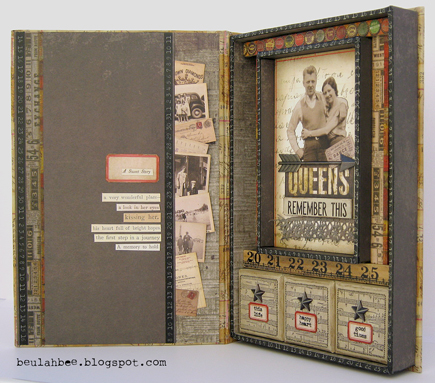
For more details on Vintage Clip Book #15 (now #13) see this post.


These are my contributions to the Tim Holtz Idea-ology booth at Creativation 2019.*

There are some terrific new products this year and some of my favorites include the new Ephemera Pack (Keepsakes), the new Layers (Remnants) and of course the Vintage Clips (which I used on small antique books).

There's not much to say that isn't already obvious technique-wise--it's just some fussy-cutting, painting, and pasting. To see the details, click on the photo for a larger view. Be sure to contact me if you have any questions, there's a link to my email address in the sidebar or you can leave me a comment.

Perhaps there will be a blog hop like last year. If that's the case, I'll pick a project and include all the specifics. Do you have a favorite you'd like to know more about? Update 1/29/2019 - There will be a blog hop (with giveaways) scheduled for February 5 hosted again this year by Richele Christensen (californiaARTgirl.blogspot.com) and will include the designers for all of Tim's new products (Idea-ology, Stampers Anonymous, Sizzix, etc.).

Thanks for stopping by and a big thank-you to Paula and Tim for asking me to contribute again this year. If you are interested in seeing my work for the Idea-ology booths from 2015-2018, here's the link.

*The last two pieces did not appear in Tim's video.

September 04, 2018

The Beekeeper's Daughter


I've made a Vignette Tray assemblage/collage to share with you today. I chose the smaller tray size and used whiting (a wood stain) and some light sanding to alter the surface. This technique is known as "pickling."

I used this finish on a CHA 2017 project and here's the link if you'd like to see another example.


A Found Relative was cut-out and placed between a sandwich of two Baseboard Frames and vintage book paper of a blue sky was attached to the back.

The background consists of the stained wood of the tray along with vintage book paper text.

The large white script was made using a home-made stencil and white paint on Plain Collage Paper.

By using the collage paper, I have lots more control over where it's placed and after pasting down it becomes almost invisible.


The tiny bee on top is an image transfer on the backside of a vintage button (I filled in the holes with paste medium).

The sunburst is also a transfer and the image came from a Trader Joe's flyer.

The gentlemen were cut from French Industrial paper stash and there's also a vintage postage stamp.


The flowers were cut from the Wallflower paper stash and that's an Idea-ology key dabbed with white paint and dark ink to distress it.

The honeycomb was made with a Tim Holtz Mixed Media thinlet.

This piece was a long-time in the making and there were several versions before I finalized it.

Funny thing, though--I ended up returning to my original idea. I guess I needed to try out all the possibilities before I could fully embrace the design.

May 05, 2018

Moments in Time


Time. Oh what a topic and such a precious commodity! It's the theme at Simon this week and here's what I made.

Crafted from some Idea-ology bits (pocket watch, flowers) and the new Worn Wallpaper, it was assembled with a homemade box and basswood strips. The support for the pocket watch is a small wooden tag turned upside down.


A vintage image was placed under the dome of the watch and I embellished it with a ball chain. The quote is an image transfer.

July 31, 2017

Dinner Party


The Monday challenge over at Simon Says Stamp is Food and/or Drink and I thought I'd do something with Idea-ology Silverware.


Well, one place setting led to another and the result was a dinner party in an altered Idea-ology Vignette Box filed with silverware, an ornate plate and a salvaged doll with adornments.

Click to Enlarge Photo

All of this covered in tissue paper stamped with tiny text and black dots plus two altered vintage light bulbs (not to be confused with ice cream cones). The large text is an altered quote chip and the roulette wheel is an Idea-ology Collector Layer.


The outside of the box was "pickled" with a white stain. The crown and scepter were tinted with alcohol ink. Red paper was used in the back of the box. Clear crackle medium and walnut ink helped to age some of the surfaces.


My tiny little box will find it's way to a shelf in my studio and remind me that, in art (and also in cooking), all the things we make are as unique as we are. Bon appétit!

-----------------------------------------------------------------------------------

It's been a real privilege to participate as a guest designer this month. I am so proud to be a part of a community that fosters so much creativity and joy.


Why don't you join us for this week's challenge?

If you upload your creation to the Simon Says Stamp Monday Challenge Blog you'll have a chance to win a $50 voucher at the Simon Says Stamp store!


Here are links to the supplies I used for this project:


January 26, 2017

CHA 2017 (Creativation) Show Samples

It was a privilege and an honor to create Idea-ology show samples for this year's Craft and Hobby Association Convention.

I was asked to use Configurations boxes and the new Vignette Trays so at least I had some direction but honestly, I was completely overwhelmed. There were just too many possibilities and I didn't know where to begin! It was a challenging experience.

It's so interesting to see the other participants' creative use of the new products and so I'm sharing mine with the hope you'll get an idea or some inspiration for your next project!

Click on the photos below for a link to the details

of how they were made (and close-up views).


 Configurations Box
Configurations Box
 Mini Configuratons Book
Mini Configurations Book
Large Vignette Tray
Small Vignette Tray
Vignette Box

October 29, 2016

Field Notes


Autumn means a second spring here in Phoenix. After the long, dry summer (when plants are in survival-only mode), cooler temps give them an opportunity for another growth spurt before winter sets in.

Trees don't turn colors or lose their leaves but seed pods, so common among many desert-adapted trees, have dried out and begin to fall.

So, when this week's theme at Simon's Monday Challenge Blog was Autumn, I thought to pick up an empty pod on an evening stroll and made a paint box out of it. Crazy? Yes, but you have to admit it's original!

April 25, 2016

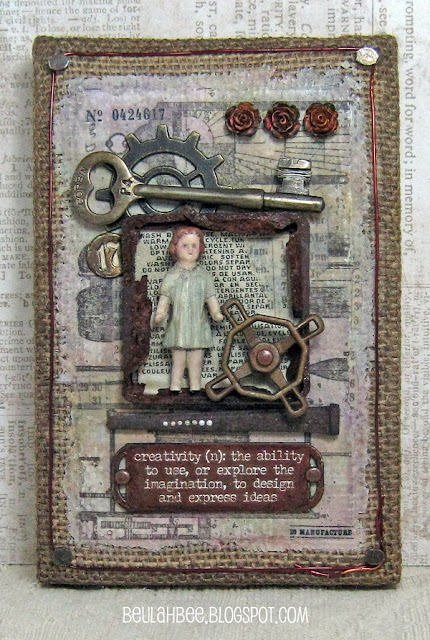
Creativity


This is my last week as a guest designer for the Simon Says Stamp Monday Challenge Blog and it has been a wonderful experience.

This is such a great blogging community full of inspiration and information--I'm happy to be a part of it and grateful for the feedback I've received!


This week's challenge is to use a metallic element so I made an assemblage that would definitely set-off a metal detector!

I used found bits of really rusty metal (the square frame and large nail), a vintage key and lots of Idea-ology including a Quote BandNumber BradGadget Gear, and Faucet Knob.


A border for the Burlap Panel was made using tacks and copper wire (credit to Paula Cheney at oneluckyday.net for this idea).

The background technique is rather unconventional. After prepping the burlap with paste medium (to fill in and even out the surface), I transferred an image cut from the Destinations Paper Stash using polymer medium. The overage of paste medium around the edges was tinted to match the paper.


I've done image transfers with lots of Paper Stash and I suspect it would work with other brands as well. Here's a link to a recent tutorial which describes my technique in more detail.


I included a doll and roses because of the Quote Band. The Salvaged Doll is the artist, the faucet knob represents effort, the number stands for time, the key unlocks the idea, the gear stands for the process and the result is beauty represented by the three Heirloom Roses.


It's fun and easy to transform the doll from its original, stark-white appearance. I just covered her with off-white paint, used blue for the dress, brown for the hair and mixed-up a flesh tone for the face, arms and legs. Everything was coated with fine crackle medium and after it dried, I dropped in some Tea Dye Distress Stain to emphasize the cracks. A tiny drop of red ink went on her cheeks and a fine-tip black marker helped define the eyes and mouth (my photo doesn't do her justice).

I wanted to match the roses to the other pieces but didn't have rust-colored alcohol ink. Since mixing colors opposite each other on the color wheel makes mud, I thought to drop an assortment of colors I did have on top of the roses until I got the look I was after. Then I took the shine away with some fluid matt medium.


The Quote Band was also given a rusty look. I filled in the letters with white paint, wiped the background with a rust-colored ink (like StazOn) and used black paint to distress the edges. I used an antique gold metal paint on the Faucet Knob and glued on a few brads with Glossy Accents.

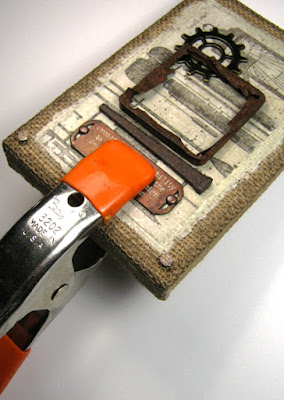
Speaking of glues, if you'd like to try making an assemblage but you're not sure how to anchor the elements I have some advice. Use nails, screws or wires when you can (no problem with the Burlap Panel since the backing is made of wood). When you can't, a good urethane-based glue (like Duncan's Liquid Fusion) and some clamping will secure just about anything. You can see my other assemblages here.


There are other details about this piece that I could mention but if you've already read through what just may be the longest post in the history of craft blogging, then I may have said too much already!

---------------------------------------------------------------------------------


Please join us for this week's challenge and when you upload your creation to the Simon Says Stamp Monday Challenge Blog you'll have a chance to win a $50 voucher at the Simon Says Stamp store!


Here's a list of the products I used for this challenge which can be ordered from Simon: